Wednesday, February 29, 2012

Making Babies Review and Giveaway


**The Winner is: Jessica B** You have been sent an email!


Guest Post by Jennifer Allen

I had the opportunity to review the Making Babies DVD series, and the Making Babies Book as well. In the Making Babies DVD series you will be purchasing 3 DVDs for $75.00. Shoshanna Easling presents her information in a very energetic and informative manner. I was impressed with the wide range of information shared in the course of 7 hours of instructive pregnancy and postpartum help.

In Making Babies DVD Volume 1 you will find recipes, remedies, herbal concoctions, and information about pregnancy in the first trimester such as dealing with morning sickness. There is some brief information about fertility and conception.  This DVD is 2 hours 30 minutes long.

In Making Babies Volume 2 you will learn how to make healthy recipes, remedies, herb concoctions, and information about the second and third trimesters, exercise, birth preparations, and more. This DVD is 2 hours 15 minutes.

Making Babies Volume 3 is full of more healthy recipes, remedies, herbal concoctions, and information about birth, postpartum, loosing weight, getting into shape, and more. It is 2 hours 20 minutes long.

I found each DVD follows the general format of a lovely outdoor location where Shoshanna shows you how to make a herbal concoction or remedy. Following this is a pregnancy tip, followed by a recipe she shows you how to make in a beautiful indoor kitchen, and some more helpful tips. You are following along with Shoshanna during her pregnancy, birth, and postpartum time. I learned a great deal of herbal information I was not aware of shared in the DVD’s.  Some of the tinctures and herbal recipes shared would be worth the purchase of the DVD’s on the merit of that information alone. I was impressed with the quality of the filming for these DVD’s.  It made watching these very pleasant, along with Shoshanna’s cheerful sharing of information. 

I enjoyed watching Shoshanna in the kitchen as she shares many healthy recipes in the DVD’s. A huge part of a healthy pregnancy and baby can be on the way you eat. I thought she shared some delicious looking recipes.  At the end I was so inspired by her recipes that I want to try and use them solely for next month's menu plan. She uses lots of vegetables and good proteins without tons of exotic items that would cost you a fortune when grocery shopping. She does feel it is best to go gluten free during portions of your pregnancy and after baby's birth so there are gluten free recipes shared as well.


Following the Making Babies DVD series is the awesome Making Babies Book available for $35. Talk about being impressed! I was blown away by this 480 page book. The minute you open the book the first thing that jumps out at you is how beautiful it is. That may sound funny, but the photography is so gorgeous throughout the book. With bright lovely photos, Shoshanna’s signature energetic style jumps out at you through the pages. 


Beyond that, the book begins following the Making Babies DVD’s. You will find the recipes and herbal remedy recipes from Making Babies DVD Volume 1, followed by the recipes for Volume 3 and 4. Moving on from there is a large section titled My Pregnancy Cookbook.  There are over 100 recipes shared running from Beverages to Breads, Desserts, Breakfast, Main Course Salads, Sauces and Condiments, Vegetables and Side Dishes. Following this is a “Did You Know” section with basic tips and suggestions shared for a healthy pregnancy. Grandma’s Remedies section covers practical recipes for pregnancy, nursing, and beyond. A Baby Diary is included with approximately 50 pages to fill in for the 1st month of pregnancy to the birth of your child. Despite the Making Babies title I would recommend this book to any woman on the basis of healthy recipes and herbal remedies alone. I know I will be using it for next month’s menu plan!


Would you like to win a set? The Bulk Herb Store has graciously agreed to giveaway a set! Enter using the Rafflecopter Form below (email subscribers please click through to enter). 


Read more »

Labels: , , , ,

Thursday, February 9, 2012

Cream Pie Recipe


After giving birth to Deborah dear friends brought meals over every other night for the first two weeks. One family brought us over this very yummy cream pie. I was thrilled when she sent me the recipe as I've looked a long time for a cream pie recipe that does not call for cool whip.

This is super easy to make, and would be a perfect dessert to make with your daughter! 

Cream Pie

1 8 oz. package cream cheese, softened

1 cup heavy whipping cream

1/3-2/3 cup sugar (you can decide how sweet you want the pie)

1 tsp. vanilla 

1/2 Tbsp. plain knox gelatin, dissolved

1 graham cracker crust

Topping Ingredients

1 Tbsp. butter, melted

2 Tbsp. graham cracker crumbs

1 Tbsp. sugar

3 Tbsp. finely chopped walnuts

Dash of cinnamon

Directions:

Place 2 Tbsp. cold water in a metal measuring cup and sprinkle gelatin into cup. Let stand until softened. Place measuring cup on burner (metal measuring cup!) and warm on medium until dissolved, stirring. Set aside.


Whip cream until stiff peaks form. Set aside. 

Mix cream cheese and sugar in mixing bowl until there are no lumps. (Wipe sides several times.) Add vanilla to cream cheese and mix on medium. Drizzle gelatin in while mixing. 


GENTLY fold cream into cream cheese mixture with spoon and then place in graham cracker crust. Set into the refrigerator to begin chilling. 

Combine topping ingredients and spread out on an oven-safe plate. Toast in oven for a few minutes so it isn't so soft. (watch closely as it will burn quickly!)

*Be very careful adding your cream into your cream cheese mixture. Barely mix it together or it will start to lose the fluffiness!*

You can add lots of different toppings to this. I made this one plain and we enjoyed it! Fruit toppings would be especially yummy! 

I hope your family enjoys this easy and delicious treat. 


I'm linked up at:


Labels: ,

Thursday, December 22, 2011

My Christmas Baking List {And a Link up!}

My family has a tradition every year that we get together and have a holiday baking day. We then share the goodies together on Christmas Day, and bring treats to our neighbors also. It is a lot of fun to be together for a day while making yummy things!

I asked my husband for any requests he had, and I wasn't surprised that his request was pretty simple - chocolate chip cookies! Seriously, that is his favorite dessert. :)

Here is what I picked out to make this year.


I can't wait to bake all this today! What holiday treats are you making? I'd love to have you share below any Christmas recipes, or any blog posts related to Christmas at all!

Please link up using the button below on your blog post! 


Photobucket


Labels: ,

Wednesday, October 5, 2011

Homemade Chicken Noodle Soup and Chocolate Pretzel Peanut Butter Bites

I promised on Facebook yesterday that I would share if these recipes turned out! For the first time ever I actually made homemade noodles for Chicken noodle soup. For some of you that is no big deal, you probably have been doing that for years! But making new things like that excites me. What can I say, my sweet mother was the same way and I got it from her!

Here is the recipe I used. My husband really liked it, and most of my children liked it. Some said the noodles were to thick, but I have to admit to having incredibly picky children at times. We are working on that. :)


For the record, I'm not crazy about the name of the blog. :) 

The other recipe I made turned out pretty good. For some reason I wouldn't rate it as being the best truffle type recipe I have tasted, I didn't grind up the pretzel bites as fine as I would have liked. But who can complain about pretzels, peanut butter, and chocolate being put together?


I found these very hard to pat together with your fingertips as the recipe called for. After doing just a few, my fingers became so sticky that I couldn't keep a ball together. So I pulled out my trusty cookie dough scoop (please tell me that everyone owns one of these? I use it all the time in my kitchen!), and it became so easy to do! 

I was worried for a while in this pregnancy that I wasn't gaining enough weight (a new problem for this pregnancy, it was just because I was so sick for so long). But I'm not worried anymore. I forgot I have to get through Thanksgiving and Christmas before I can have the baby. If I keep finding yummy recipes like this....well, let's just say I'll have to start watching what I eat. :) 

Labels: ,

Wednesday, June 29, 2011

Biscuit Cinnamon Rolls Recipe


I will freely admit it. I am not that type of mom.

You know, the one who gets up at 4:00 am to make cinnamon rolls from scratch for her husband and children to eat as they come to the dining room table for breakfast. :)

When I make real cinnamon rolls, it's generally as a dessert for dinner. But I've been craving cinnamon rolls lately (among many other things!) so I pulled out this tried and true biscuit cinnamon roll recipe I've made since I was a teenager.

Biscuit Cinnamon Rolls

Sift together:

2 cups. w. w. flour (I use freshly ground pastry flour)
1/2 tsp. salt
5 tsp baking powder
1/2 tsp. creme of tarter

Add to the flour mixture:

1/2 cup plus 1 TBSP butter
2 tsp. honey or brown sugar (or raw sugar would work also)

With pastry blender (or fork!) blend until course meal.

Add all at once:

1 cup milk

Mix with a fork just until moistened. Turn onto a lightly floured counter top. Kneed 15 strokes. Pat or roll 3/8 inch thick (make sure you have plenty of flour down so it doesn't stick to the counter) into a rectangle. Spread butter, brown sugar, or honey, and sprinkle cinnamon powder. Roll and cut as for cinnamon rolls.


Bake, cut side down in a well greased 9 x 13 pan for 12-15 minutes at 450 degrees.

Enjoy!

My children say they like American cinnamon rolls better ( I guess that is what they call the regular type of cinnamon rolls, so cute!) but I still hear plenty of cheers from them when I pull these out of the oven. I like that they are made with whole wheat flour, so I don't feel as bad about fixing them. :)

Labels: ,

Tuesday, August 31, 2010

One Awesome Health Cookie Recipe

Want to try a yummy gluten free, dairy free, sugar free cookie? Yes? Well great! Today I wanted to share a delicious recipe for Health Cookies. Yes, I did say health! Years ago a bakery was going out of business in a local natural foods store. My Mom asked for the recipe for the Health Cookies. The recipe was kindly written down and handed to her. What a treasure! My brother, sister, and I loved those cookies and she bought those for us as often as she could. They were a wonderful treat.

I recently pulled them out of my recipe file and made a batch. They were just as good as I remembered. These cookies are dairy free and sugar free. For those of you who can’t have gluten products simply change the wheat flour into a gluten free flour of your choice and you are ready to go. As far as I understand bakeries measure their ingredients by weight, not measuring cups and spoons. So pull out your kitchen scale and have a yummy healthy treat!

From Jennifer Allen

Grind up separately then mix together:
¼ lb whole pitted prunes
½ lb whole pitted dates
¼ lb raisins
Have a little helper for extra fun.

Add 1 lb of bananas

Mix it all together

Then add:
1 oz wheat germ
½ oz Baking Soda
½ lb peanut butter
½ lb & 1 oz whole wheat flour
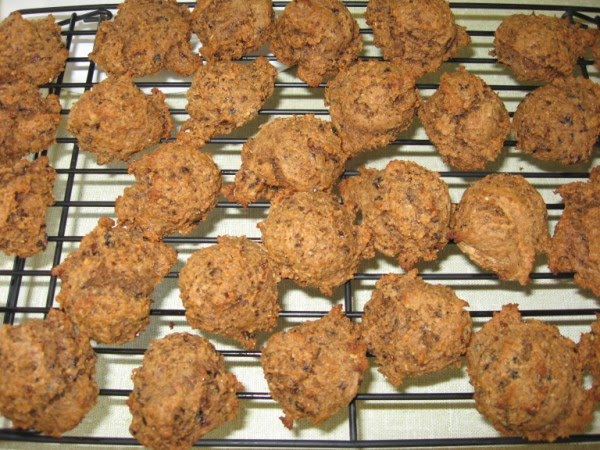
When your done mixing it will look something like this.

Eat some batter on your way to the oven. Hey, no fears, no raw eggs.
Bake at 350 degrees for 12 minutes on a lightly greased cookie sheet.

Before you know it you'll be enjoying some delicious guilt free cookies. :-)
Health Cookies

Grind up separately then mix together:
¼ lb whole pitted prunes
1 lb bananas
½ lb whole pitted dates
¼ lb raisins

Mix in to the ground mixture:
1 oz wheat germ
½ oz Baking Soda
½ lb peanut butter
½ lb & 1 oz whole wheat flour

Bake at 350 degrees for 12 minutes on a lightly greased cookie sheet.

To make these gluten free you could try using: Oatmeal flour, rice flour, barley flour, or another gluten free flour of your choice.

Labels:

Monday, July 26, 2010

The Banana Breads Marathon

When I did my grocery shopping this week I stopped at Aldi's. They had these bananas on sale for .25 a pound. They were perfect for banana bread. I went over to the Tasty Kitchen to find three different banana bread recipes.

Here I found the recipes and divided the bananas. Two of the recipes I was going to double.

After I was finished with this marathon baking I had seven loaves of banana bread. Yes, I did say seven. I'm excite to share these with family, bring to our church potluck, and still have a few in the freezer.

We had a taste testing of the recipes when all the loaves were cool. Here are the recipes I used:

And the winner was...The Moistest Banana Bread....Ever! This is the best banana bread I have ever had. This recipe has two stars, awesome!, and a smiley face on the recipe. Needless to say, we liked it. :-)

The runner up was Grandma Betty's recipe. With the Banana Apple bread I was trying to use up my whole wheat stone ground flour. It is a very heavy course wheat flour and I think it was just too heavy for the recipe. That bread turned out dry. All in all it was a very successful banana bread marathon. I had fun and we have plenty of yummy bread to share.
From Jennifer Allen

Labels:

Monday, May 10, 2010

Make It Monday: Recipes

Due to the busy weekend my priority was not in getting my menu plan done by Saturday night. Instead I will be making my menu plan this afternoon. You'll have to excuse me for being out of the loop this week. Instead I thought I would share a few of my favorite recipes.

The first is a spinach salad. It is great with crackers and vegetables for a lunch or as an appetizer. Alas, I am in the only one in my home who will eat it. Solution? I will halve the recipe so there isn't so much of it and enjoyed it by my lonesome.:-)

Spinach Salad
2 boxes frozen spinach
4 hard boiled eggs, diced
½ cup diced onion
1 cup shredded cheese, cheddar
1 tsp. garlic salt
¼ tsp. Tabasco
1 Tbsp. vinegar
½ cup mayo

Thaw frozen spinach and squeeze dry (excess water). Mix all ingredients adding the eggs last. Refrigerate and serve. This taste best on the second day.
~~~~~~~~~~~~~~~~~~~~~~~~~~~~~~~~~~~~~~~~~~~~~~~~~~~~~~~~~~~~~~~~~~~~
Putter Fingers:
This recipe was a mainstay for my Mom as we were growing up. Not only are they quite yummy but the Putter Fingers are a great source of protein. Perfect to be made up for pregnant moms!

Putter Fingers
½ cup melted butter
3 cups quick oats
1 cup honey
3 Tb. Carob powder (or cocoa)
¾ cup powdered milk
½ tsp. salt
2 tsp. vanilla
½ cup peanut butter
½ cup raisins
½ cup sunflower seeds
(optional: can omit the raisins and sunflowers seeds and add 1 cup of carob chips or chocolate ships.)

Combine melted butter and oats in a large bowl. Mix well. Add remaining ingredients and mix well. Shape with moist hands or buttered hands into balls. Chill until firm. Store in closed container in the refrigerator.
~~~~~~~~~~~~~~~~~~~~~~~~~~~~~~~~~~~~~~~~~~~~~~~~~~~~~~~~~~~~~~~~~~~~
Looking for a healthy simple drink? Look no further. I have wanted to find something my husband would enjoy as a smoothie but would get some green veggies in for him. This green smoothie has been perfect! My husband likes it and is more than happy to get his spinach down this way since he can’t taste it. I buy a large bag of frozen strawberries at Costco and my organic spinach.

Green Smoothie
1cup Frozen banana slices
1 cup frozen strawberries
1 cup fresh spinach
1 cup orange juice

Blend together and drink. Makes 1 serving
~~~~~~~~~~~~~~~~~~~~~~~~~~~~~~~~~~~~~~~~~~~~~~~~~~~~~~~~~~~~~~~~~~~~
For the bananas I realized I could freeze my own much cheaper than buying them in the store.
I found a bunch of ripe bananas on sale.

I cut them up in slices putting them on a wax paper covered cookie sheet.

I had so many bananas and not enough cookie sheets or room in the freezer. After the first layer of bananas was on the cookie sheet I put another piece of wax paper on the cookie sheet on top of the bananas. I filled this layer up with bananas as well. I was able to do this second layer on both cookie sheets then put them in the freezer for several hours. When you take the cookie sheets out of the freezer you need to let the bananas thaw out a bit, say 5 minutes or so. Otherwise you will be tearing bananas off the wax paper instead of pulling them off and create a royal mess. Take all the bananas off the cookie sheets and put them in Ziploc freezer bags. Now you have frozen bananas ready to go for your smoothies with little time involved and it cost you much less!
~~~~~~~~~~~~~~~~~~~~~~~~~~~~~~~~~~~~~~~~~~~~~~~~~~~~~~~~~~~~~~~~~~~
After finding this recipe on Money Saving Mom I have made it both in the Banana muffins and the Blueberry muffins. This is now my husbands favorite muffin recipe.

Banana or Blueberry Crumb Muffins
1 1/2 cups whole wheat flour (whole wheat pastry/soft spring wheat is the best!)
1 teaspoon baking soda
1 1/2 teaspoon baking powder
1/2 teaspoon salt
3 bananas, mashed
3/4 cup rapadura or sucanat (natural sweeteners) or sugar
1 egg, lightly beaten
1/3 cup butter or coconut oil, melted – or replace with half applesauce, as desired
Topping, optional:
2 Tbsp whole wheat flour
1/8 teaspoon ground cinnamon
1 tablespoon butter
1/4 cup sugar, optional
In a small bowl, mix together 1/4 cup sugar, 2 tablespoons flour and cinnamon. Cut in 1 tablespoon butter until mixture resembles coarse cornmeal. Sprinkle topping over muffins.
Preheat oven to 375 degrees F (190 degrees C). Lightly grease 12 muffin cups.
In a large bowl, mix together 1 1/2 cups flour, baking soda, baking powder and salt. In another bowl, beat together bananas, sugar, egg and melted butter. Stir the banana mixture into the flour mixture just until moistened. Spoon batter into prepared muffin cups, filling 3/4 full (Definitely fill all 12, otherwise they will overflow). Bake in preheated oven for 18 to 20 minutes, until a toothpick inserted into center of a muffin comes out clean.

Blueberry Variation: Replace bananas with 1 cup of fresh or frozen blueberries and 3/4 cup applesauce. Yum!Enjoy!

From Jennifer Allen

Labels:

Monday, April 19, 2010

Peanut Butter Crispy Balls Recipe

These were brought to potluck one week. They were a yummy treat. It can't get any easier that this!

Peanut Butter Crispy Balls
1 lb. powdered sugar
2 cups creamy or crunchy peanut butter
1/2 cup butter-softened
2 tsp vanilla
3 cups cocoa flavored Rice Crispy

Mix butter and peanut butter with vanilla, then add powdered sugar and Rice Crispy.

Labels:

Friday, April 16, 2010

Recipes for Freezer Meals

Yesterday in the Freezer Meals & Ready Meals For New Moms post we took a look at the logistics of getting together a group to make these meals. If you have been wanting to try preparing some freezer meals and mixes for your own family this would be a good place to start. Now the fun part, the recipes!


These were the freezer meals:
4 Pizzas
2 meat loafs
3 of Breakfast Hot pockets
3 of Creamed Chicken
3 of Potatoes with Ground Turkey
ABC Muffin Mix
3 of Skillet Lasagna Mix
2 of Pride of the Farmer's Wife Oatmeal Cookies
Homemade Wheat Bread

When you have these meals ready for the freezer don't forget to label the Ziploc bags or freezer containers. Make it easy for yourself and write out the baking temperature and time needed on the label as well. That way you don't have to dig or search for a recipe, all the info you need for supper is right before you.

A tip on freezer containers I learned from my mother-in-law. You don't have to go to the store and spend money on special containers. As you go through normal life save any containers you could use for freezer meals. That would be yogurt, butter, sour cream, cottage cheese, dips, and etc. containers that you use. When all is gone wash them out well and save for freezer containers.

Skillet Lasagna Mix:
1/4 cup plus 2 Tb instant dry milk powder
2 Tb plus 2 tsp cornstarch
2 tsp chicken or beef bouillon granules
1/4 tsp dried basil
1/4 tsp dried thyme
1/4 tsp pepper
1 tsp dried parsley flakes
1/2 tsp garlic powder
1/4 cup dried minced onion
1/4 cup Parmesan Cheese
3 cups egg noodles

Layer the ingredients in the order given in a wide mouth 1 quart canning jar. Pack each layer in place before adding the next ingredient. Attach a gift tag with the cooking directions. If you aren't giving as a gift it can all be placed in a quart Ziploc bag. (Tip: I have found when making this mix that I don't like to have the egg noodles in with the mix itself. When making the mix this can result in a very burnt pan as the noodles soak up the moisture. Believe me! I recommend making the mix without the egg noodles. You can give them separately if for someone else. I would boil the egg noodles until done when making the recipe, then add the noodles to the rest of the already prepared mix. It makes life much easier and taste great.)

To Make Skillet Lasagna:
Makes 6 servings
1 batch Skillet Lasagna Mix
1 1lb. ground beef
2 cups water
1 (16 oz.) can tomato sauce
2 cups mozzarella cheese

In a large skillet, brown beef and crumble. Drain off fat and add Skillet Lasagna Mix, water and tomato sauce. Bring to boil. Reduce heat and simmer for 15 minutes, stirring until thickened. Boil the egg noodles until done and add to the mix. Top with Mozzarella cheese 5 minutes before serving. Turn off heat, stop stirring and allow cheese to melt.

Easy Pleasing Meatloaf
Go here for the recipe.
Once the recipe is made you can put it in the meatloaf pans with heavy foil or wax paper lining the pans and flash freeze until the meatloaf is frozen enough to hold it's shape. Once it can hold it's shape take out of the pans and cover, put in a Ziploc bag and it's ready to go.

Pizza
Go Here for the recipe for the Pizza Crust.
Make the crust first so it can be rising then gather your ingredients desired. The crust will be pre-baked for about 6 minutes then all the sauce and toppings add and frozen.

Potatoes with Ground Turkey
Buy a ten pound bag of potatoes. Peel and dice to bite size pieces. Salt and pepper well then fry up with oil in several large skillets. Put in one huge bowl when done. Have 3 lbs of ground turkey thawed. Use Turkey Sausage recipe to season the meat while cooking in a skillet. Once it is done you will combine the Potatoes and Ground Turkey together and bag desired amounts in the freezer. When it is pulled out of the freezer you will thaw it out then cook it up in a skillet with scrambled eggs (and cheese if desired) for a yummy fresh breakfast.

Turkey Sausage
3 lbs ground turkey
1 tsp garlic powder
1/2 tsp nutmeg
2 tsp black pepper
1 tsp savory
5 tsp sage
3 tsp salt
2 tsp marjoram
1/4 tsp thyme
1 Tb Olive Oil in pan

Mix all seasonings together first in a bowl. Then sprinkle over turkey as it browns.

Farmer's Wife Oatmeal Cookies
1 cup brown sugar
1 cup white sugar
1 cup butter
2 eggs
3 cups oats
2 cups flour
1 tsp baking soda
1 tsp baking powder
1/2 tsp salt1 tsp vanilla
1 1/2 cup raisins

Beat eggs and add sugar and butter. Blend well then add the raisins and vanilla. Add the rest of the ingredients. Make small balls and place on cookie sheet. The cookie balls can be placed close together since they won't be cooked at this time. Place in freezer to flash freeze until firm. Take out and place all the cookie balls in Ziploc bags and label. When baked they need 375 degrees for 9-10 minutes.

Creamed Chicken
Go here to this great website for your Creamed Chicken recipe.
Once the Creamed Chicken is made it can be frozen in Ziploc bags (be warned that is the messy method) or in freezer containers. When you pull it out of the freezer to use it can be served over rice, biscuits, toast, or noodles. See the recipe for even more meal ideas with the Creamed Chicken. Yummy!

Homemade Breakfast Hot Pockets
The recipe is here along with pictures that show you how to make them step by step. If you are having a Freezer Day I would advise having someone start on these first thing. The dough takes like 3 hours total to be ready to put in the oven to bake. On our Freezer Day everything else was done and in the freezer with all the other ladies able to go home. My sister Caroline and I were still at the church waiting on these to finish. Once they are baked and cooled they can be frozen. According to Caroline they are worth the work!

ABC Muffin Mix
The recipe is here along with the many variations of muffins you can make with this mix. This doesn't have to be frozen. Instead it can be kept in the cupboard in a large glass or plastic container. It is very handy to have this mix ready to go!

These were our Freezer Day Recipes. You can see how wonderful it would be to have these tried and true meals in your freezer ready to pull out. You can always try a little at a time and build your freezer meals slowly. Last night I put a package of chicken breast in the crock pot with seasoning and plenty of water. I plan on using the chicken to make 3 recipes of the Creamed Chicken. I can use the chicken broth from the crock pot for the recipe. I'll be happy to have these ready to go for a meal later down the road on a busy evening. When you make a pizza, make an extra one and put it in the freezer. It can be that simple and quick to begin stocking your freezer! Being prepared with an extra meal or two for your family or someone in need will be a blessing in a day to come.

From Jennifer Allen

Labels:

Monday, March 29, 2010

Organizing Your Recipes

From Jennifer Allen

I love to collect recipes. There is a love of cooking and collecting recipes passed down from my great-grandma to my Mom then to me. I have been collecting recipes since I was 16. I have changed the way I keep my recipe collection several times. I started out in one of those recipe folders, but quickly outgrew it. I then switched to card holders. I outgrew that as well. This is my current system:
This is very simple and inexpensive way to keep your recipes organized.Buy a shoe size plastic container with a lid for $1.00 at Walmart. Buy card separators and write your categories on the tabs. These are my categories:

Appetizers and Dips

Jams, Jellies, and Preserves

Breads

Beverages

Fish

Biscuits & Muffins

Soups,Salads,&Dressings

Casseroles

Fruits

Snacks

Beef

Chicken/Turkey

Beans

Potatoes

Pasta/Rice/Grains

Sauces & Gravies

Mixes

Vegetables

Misc.

Canning

Freezing

Eggs/Breakfast

Candy

Pancakes/Waffles

Cookies

Cakes & Frosting

Pies

Desserts

I keep extra 3 x 5 cards in the very front of my recipe box to grab for any that I want to write down instead of print.
When I create my menu plans each week I pull those recipes out of the box. I have a recipe folder. On the left side I put recipes I'm interested in but haven't filed yet. On the right side of the folder I put all the recipes I will use for my menu plan this week. When the week is through I take those out and put them back in the recipe box.

When we bought our house the previous owners had installed this nifty pull down shelf in the kitchen. I don't know what they used it for. I put it to good use. That's where I put the food magazines I need to look through and the green folder with my current recipes in it.

I can push this up and out of the way. Works great! If I didn't have this I would put my current recipe folder in the cabinet with all my recipe books.

A couple of times a year I go through my recipes and get rid of the ones that may not have been awful but certainly weren't a big hit. As I am cooking if something was really great I put a happy face on the recipe. Those become well used favorites! If the food from a recipe was awful it's a simple decision. I open the trash can and toss the recipe (okay, sometimes the food too). Keeps life easier. Not making that mistake twice! This makes for a happy hubby and less waste of my food.

I hope this was helpful. You can customize these ideas to fit your own cooking needs. For other ideas on organizing your recipes go here. You can also see Part One of Recipe Organization here, then Part Two of Recipe Organization here. These are good post to read if you print a lot of recipes off the internet to keep.

Labels: ,

Saturday, March 20, 2010

Baked Fish

From Jennifer Allen

I didn't grow up in a family that ate fish regularly. We had canned salmon and tuna. Other than that I thought eating fish meant a visit to Long John Silver. After my grandparents moved to Florida my Grandpa introduced us to eating fish fried, baked, or grilled. Orange Ruffy and Talupa were our beginning fair. I graduated to Bassa fish and Grouper. My Grandpa made some awesome fried Bassa fish. When he fixed it that's all we ate, plates of fish and his home made tarter sauce. It couldn't get any better than that!

Since Neil and I have been married I haven't used fish in our meals very much. Last week I found this simple recipe for baked fish from The Grocery Shrink ebook recipes. So far every recipe I've used from The Grocery Shrink has been good. They seem to be the normal Midwestern food that I'm used to. Oh, and my husband will eat the food. The fish recipe was a winner! We both loved it with these seasonings. Since they were baked I didn't have to watch them carefully like broiling the fish, and clean up was a cinch. I did melt my butter, brushed it on, then generously sprinkled on the seasonings. Ready for the recipe? Here it is:

Baked Fish
Place fish fillets in 13x9 pan. Dot with butter, sprinkle with garlic salt, pepper, and basil. Cover and bake at 350 degrees for 20 minutes or until fish flakes easily with a fork.

It's that simple. Enjoy!

Labels:

Monday, March 1, 2010

Cranberry Pudding & Sauce

From Jennifer Allen

My Mom's cousin Jeanie gave us this recipe. It's a great way to use up some extra cranberries you may have. I'm using frozen cranberries that have thawed out for mine. By the way, I think the name is a misnomer. This turns out like a quick bread, not a pudding.

Cranberry Pudding:

2 cups flour

2 tsp baking powder

1/2 tsp salt

1 cup sugar

3 Tb melted butter

Mix well. Add 1 cup of cranberries. Pour into a loaf pan and bake 1 hour in a 350 degree oven.

Sauce:

1 cup sugar

1/2 cup butter

1/2 cup cream

1 tsp vanilla

Bring to a boil. Serve over Cranberry Pudding while hot.

Labels:

Beef Barley Soup

From Jennifer Allen

This is a delicious Beef Barley Soup recipe that was given to me by Amy S. It is the best Beef Soup I've had! It is wonderful with some whole wheat bread and a salad. It may be awhile before it's ready to serve but it will be worth the wait.

3/4 lb stew meat

3 Tb flour

1 tsp paprika

1 tsp salt

1/8 tsp pepper

1 Tb olive oil

1 onion chopped

3 cloves garlic minced

3 Tb tomato paste

1 tsp thyme

4 carrots, sliced

3 cups beef broth

3 cups water

1/2 cup pearl barley

15-16 oz. tomato puree

Cut meat into 1" pieces. Sprinkle with flour and paprika. use olive oil to brown in pan. Add onion and garlic, simmer 4 minutes. Add thyme, carrots, beef broth and water. Bring to a boil. Reduce heat and simmer for 1 hour. Add barley and simmer for 25 minutes. Stir in the tomato paste and tomato puree and simmer for 20-30 minutes.

Labels:

Monday, February 8, 2010

The perfect snack for the pregnant Mama!


At the birth of my third child, my sister fixed this snack for me to have right after she was born. My midwife had some, and loved the recipe! She now gives it to all her pregnant mama's to fix, as she says they are excellent to eat especially during that yucky first trimester. They are full of protein, and carbs which are needed to keep up your energy during pregnancy. Of course, you don't have to be pregnant to enjoy these. My baby is six weeks old and I just fixed another batch of these. Enjoy!


Putter Fingers


½ cup melted butter

3 cups quick oats

1 cup honey

3 Tb. Carob powder (or cocoa)

¾ cup powdered milk

½ tsp. salt

2 tsp. vanilla

½ cup peanut butter

½ cup raisins

½ cup sunflower seeds

(optional: can omit the raisins and sunflowers seeds and add 1 cup of carob chips or chocolate ships. This is what I normally do.)

Combine melted butter and oats in a large bowl. Mix well. Add remaining ingredients and mix well. Shape with moist hands or a cookie scoop. Chill until firm. Store in closed container the refrigerator.

Labels: